Use Cases
CloudFlare
-
Create a CloudFlare account If you don’t have a CloudFlare account, create one and add a domain using this tutorial.
-
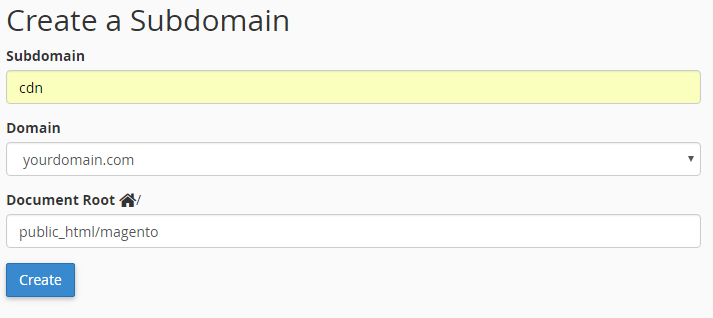
Create a subdomain Using cPanel, create a subdomain for your CDN content and point it to your Magento install directory. Here my install is in public_html/magento.
You can call the subdomain anything you like but we recommend something similar to cdn for ease of recognition.
-
Create a CNAME record in CloudFlare’s DNS settings Follow this guide to add a CNAME record in your CloudFlare dashboard, though instead of using “blog” use “cdn” or whatever subdomain you created in step 2, as below.

-
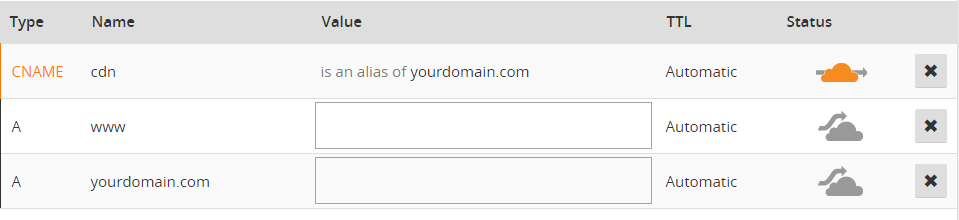
Review CloudFlare’s DNS settings Check that the only record that has its traffic routed through CloudFlare’s servers is the one you created in step 3.
In the image below you can see that only the CNAME record cdn is passing through CloudFlare’s network, as indicated by the orange cloud.
If there are any other records that are passing through CloudFlare’s network, i.e. those that have an orange cloud, click on them and ensure they are grey and therefore no longer being passed through CloudFlare’s network.
- Edit Url Navigate to System > Configuration > Templates Master > CDN > Dns-Based Cloud > Url Set you cdn url and save

- Clear your Magento cache by navigating to System > Cache Management > Flush Magento Cache Your Magento 1.9 store’s static content should now be being served by CloudFlare and you should notice a performance improvement.
KeyCDN
- Create a pull zone or a push zone.
- Log in to the Magento admin panel.
-
Edit Url
Navigate to System > Configuration > Templates Master > CDN > Dns-Based Cloud > Url Set you cdn url
- Once this is complete save the config.
- Clear your Magento cache by navigating to System > Cache Management > Flush Magento Cache
MaxCDN
- Create a Pull Zone
- Log in to the Magento admin panel.
-
Edit Url
Navigate to System > Configuration > Templates Master > CDN > Dns-Based Cloud > Url Set you cdn url
- Once this is complete save the config.
- Clear your Magento cache by navigating to System > Cache Management > Flush Magento Cache
CDN77
- Log in to the Magento admin panel.
-
Edit Url
Navigate to System > Configuration > Templates Master > CDN > Dns-Based Cloud > Url Set you cdn url
-
Update the following with your CDN URL or CNAME (You will find both under Manage CDNs in CDN77 CROP).
- Once this is complete save the config.
- Clear your Magento cache by navigating to System > Cache Management > Flush Magento Cache