Contents
- No tabs after installation
- Disable native tabs in Magento 1.9 RWD theme
- Reccuring info tab
- Askit products questions block in tab
- Dynamic tab titles
- Unset multiple blocks
- Duplicated tabs on product page
- Adding Custom Product Content
- Activate scrolling to tab by clicking an external link
- Using public events to call javascript on tab activate or deactivate
- Adding Font Icons to Tab headers
No tabs after installation
If you do not see tabs on product page after installation:
- Check if the extension was enabled in
System➔Configuration➔Templates-Master➔EasyTabs➔General➔Enabled - Check if module output is not disabled in
System➔Configuration➔Advanced➔Advanced➔Disable Modules Output➔TM_EasyTabs - Open your theme
catalog.xmland check if your theme hasproduct.info.additionalblock incatalog_product_viewsection. If not, please add it or change reference tocontentor other existing block inapp/design/frontend/base/default/layout/tm/easytabs.xml.
Disable native tabs in Magento 1.9 RWD theme
There are 3 ways of dealing with native tabs:
-
Hide tabs with css.
.product-view .tabs { display: none; } -
Remove tabs from
catalog/product/view.phtmltemplate. Find the following lines and remove them:<div class="product-collateral toggle-content tabs"> <?php if ($detailedInfoGroup = $this->getChildGroup('detailed_info', 'getChildHtml')):?> <dl id="collateral-tabs" class="collateral-tabs"> <?php foreach ($detailedInfoGroup as $alias => $html):?> <dt class="tab"><span><?php echo $this->escapeHtml($this->getChildData($alias, 'title')) ?></span></dt> <dd class="tab-container"> <div class="tab-content"><?php echo $html ?></div> </dd> <?php endforeach;?> </dl> <?php endif; ?> </div>
Reccuring info tab
Create new tab with following configuration:
General Details
- Title:
Recurring Profile - Alias:
recurring_info - Block Type:
Custom Block - Sort Order:
10 - Status:
Enabled
Widget Options
- Block:
payment/catalog_product_view_profile - Template:
payment/catalog/product/view/profile/schedule.phtml - Unset (reference::block_alias):
product.info::recurring_info
Askit products questions block in tab
You can move questions block from AskIt extension to tab with following configuration:
General Details
- Title:
Questions ({{eval code="getCount()"}})or any other title you want. - Alias:
askit_tabbedor any other alias you want - Block Type:
Custom Block - Sort Order:
90or any other sort order to place tab at position you need. - Status:
Enabled.
Widget Options
- Block:
askit/discussion - Template:
tm/askit/question/list.phtml - Unset (reference::block_alias):
product.info.additional::askit
Dynamic tab titles
Use eval directive to call block methods in tab title.
| Block | Dynamic Tab Title |
|---|---|
| Tags | Tags ({{eval code="getCount()"}}) |
| Reviews | Reviews ({{eval code="getReviewsCollection()->count()"}}) |
| Askit | Questions ({{eval code="getCount()"}}) |
Unset multiple blocks
Use comma to unset multiple block from layout.
Examples:
parent_block1::block_to_unset1,parent_block2::block_to_unset2right::catalog.product.related,product.info::related_products
Duplicated tabs on product page
You can find a lot of custom magento themes with tabs added in layout xml files.
When you install EasyTabs in such themes, you can see tabs block twice on product
page. To fix it, open your theme catalog.xml or local.xml and find tabs
block, it can be looking like this:
<block type="catalog/product_view_tabs" name="product.info.tabs" as="info_tabs" template="catalog/product/view/tabs.phtml" >
    <!-- Product description -->
    <action method="addTab" translate="title" module="catalog">
        <alias>description</alias>
        <title>Product Description</title>
        <block>catalog/product_view_description</block>
        <template>catalog/product/view/description.phtml</template>
    </action>
    <!-- Product attributes -->
    <action method="addTab" translate="title" module="catalog">
        <alias>additional</alias>
        <title>Additional Information</title>
        <block>catalog/product_view_attributes</block>
        <template>catalog/product/view/attributes.phtml</template>
    </action>
    <!-- Reviews-->
    <action method="addTab" translate="title" module="review">
        <alias>tabreviews</alias>
        <title>Reviews</title>
        <block>advancedreviews/product_reviews</block>
        <template>advancedreviews/product/reviews.phtml</template>
    </action>
</block> <!-- end: tabs -->
Make layout xml file backup and remove this block, refresh cache.
Adding Custom Product Content
Sometimes users need to create tab with content that is related only for current product similar to “Description”.
EXAMPLE: We’ll create “Video Review” tab that is often asked by users.
- Go to
Admin➔Catalog➔Attributes➔Manage Attributes➔Add New Attribute. -
Set
Attribute code = 'product_video'andCatalog Input Type = 'Text Area'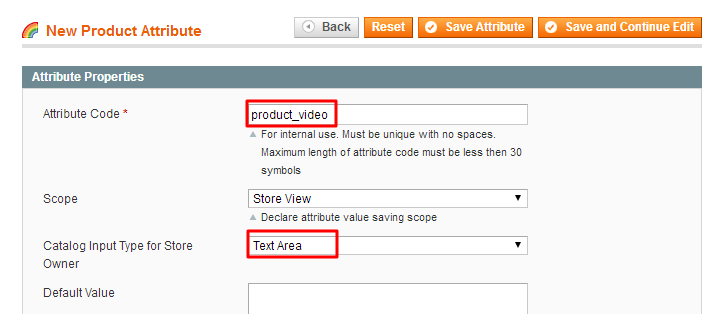
-
Assign
product_videoattribute to needed Attributes set (make store indexes reindex if required)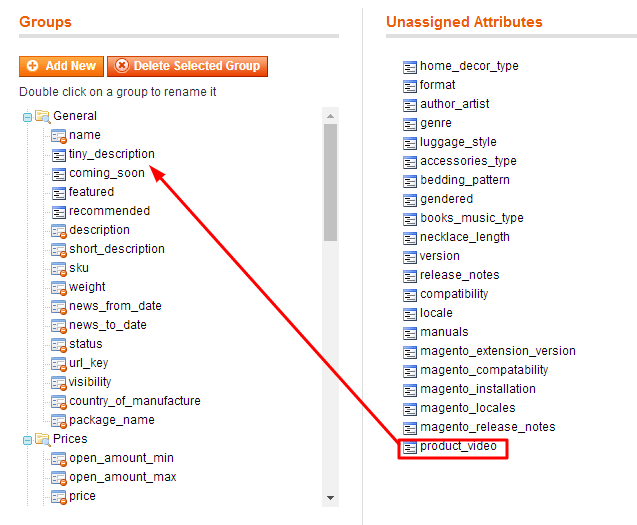
-
Go to
Admin➔Templates Master➔Easy Tabs➔Product Tabsand add new Custom attribute tab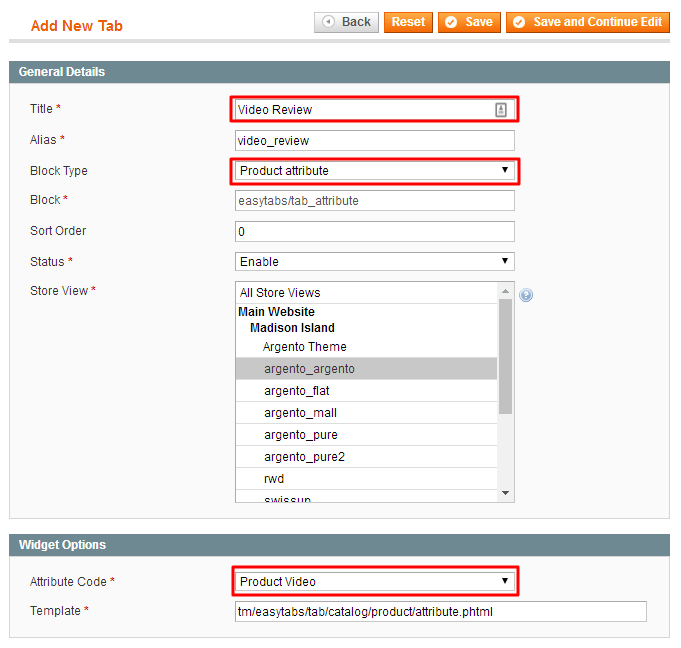
And save.
-
Then go to one of your products settings
Admin➔Catalog➔Manage Productsand fill custom content in Product Video field (you can get it in Youtube videos SHARE section ) i.e.<iframe width="560" height="315" src="https://www.youtube.com/embed/tQ1tq6nvHD8" frameborder="0" allowfullscreen></iframe>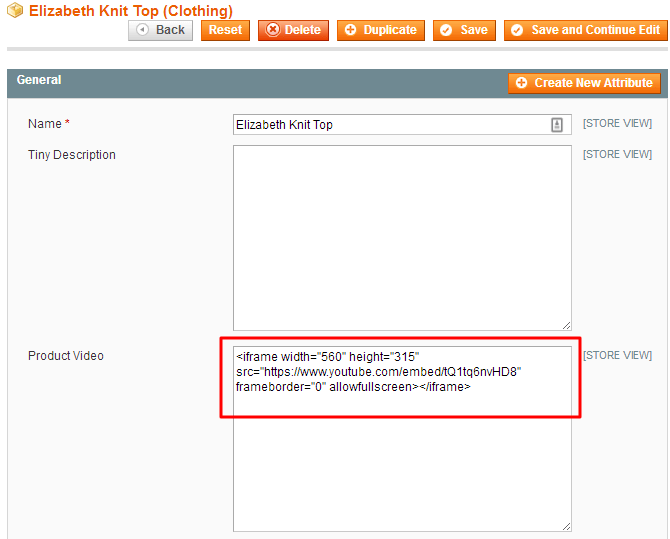
-
Now we shoud get following view at Product page

Activate scrolling to tab by clicking an external link
There are two possible ways to implement this feature:
-
Edit the link
hrefandclassattributes in template source:<a href="#TAB_ALIAS_FROM_BACKEND" class="easytabs-anchor easytabs-scroll easytabs-animate">Description</a>For example, the link mentioned below will activate the description tab:
<a href="#product_tabs_description_tabbed" class="easytabs-anchor easytabs-scroll easytabs-animate">Description</a> -
Use the external javascript to add the onclick observers.
$$('WRITE_SELECTOR_HERE').each(function(el) {
    el.observe('click', function(event) {
        var element = this;
        easytabs.each(function (tabs){
            tab = tabs.getTabByHref('#product_tabs_' + 'TAB_ALIAS_FROM_BACKEND');
            if (tab) {
                var scroll  = true,
                    animate = true;
                tabs.onclick(element, null, '', scroll, animate);
                event.stop();
                throw $break;
            }
        });
    });
});
For example, the code below shows how to add the onclick event to the
Write ReviewandRead Reviewslinks:$$('.rating-links a, .no-rating a').each(function(el) { el.observe('click', function(e) { var element = this; easytabs.each(function (tabs){ tab = tabs.getTabByHref('#product_tabs_' + 'review_tabbed'); if (tab) { var scroll = true, animate = true; tabs.onclick(element, null, '', scroll, animate); event.stop(); throw $break; } }); }); });
Using public events to call javascript on tab activate or deactivate
There are four public events available to listen:
- easytabs:beforeActivate
- easytabs:afterActivate
- easytabs:beforeDeactivate
- easytabs:afterDeactivate
Example:
document.observe('easytabs:afterActivate', function(e) {
    var tab      = e.memo.tab,        // string
        content  = e.memo.content,    // dom element
        easytabs = e.memo.easytabs;   // easytabs instance

    console.log(tab + ':' + easytabs.getActivationCount(tab));
});
Adding Font Icons to Tab headers
You can make make your Tabs look better by adding font icons in the heading
![]()
Note: Some Font library (i.e. FontAwesome, IonIcons, WeLoveIconFonts) should be enabled at your site
Let’s take FontAwesome as an example.
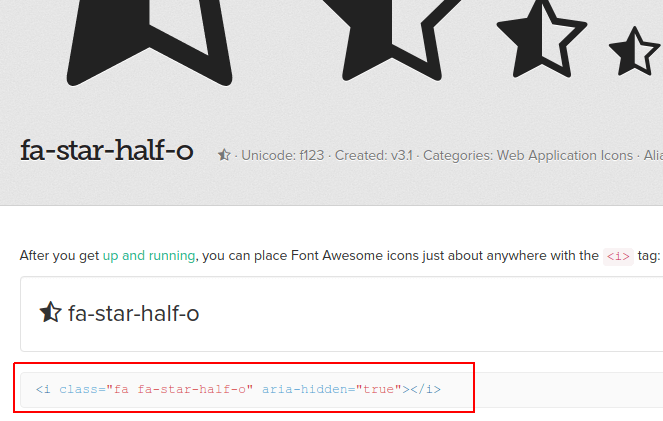
- Go to icons catalog and choose the one you like
-
Select the code to insert
- Go to Magento admin
TemplatesMaster > EasyTabs > Product Tabsand edit tab -
Insert your icon code to Tab Title field before/after the caption
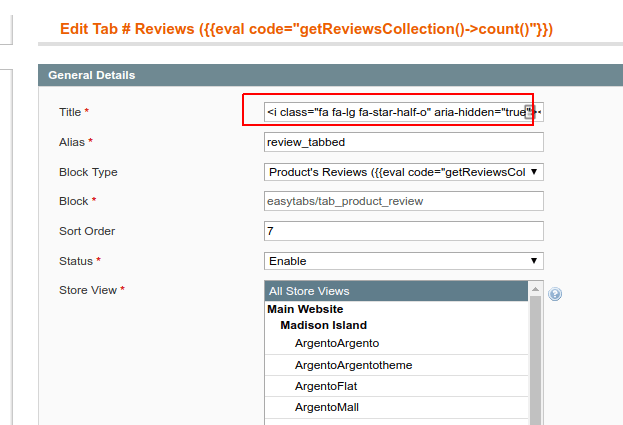
- You can add
fa-lgclassname to make icon a bit bigger (in case you’re using FontAwesome)