Creating campaign
Follow the detailed process of campaign creation. In case of proper campaign customization you would easily attract new subscribers, send them the affecting email newsletters and subsequently get excellent reports on the results. Keep in mind, that our extension allows to send campaigns to three separate subscriber types mentioned in Basic terms.
Go Admin > Templates Master > Newsletter Booster > Campaigns and create a new Campaign. You will be allowed to create multiple campaigns.
Campaign settings
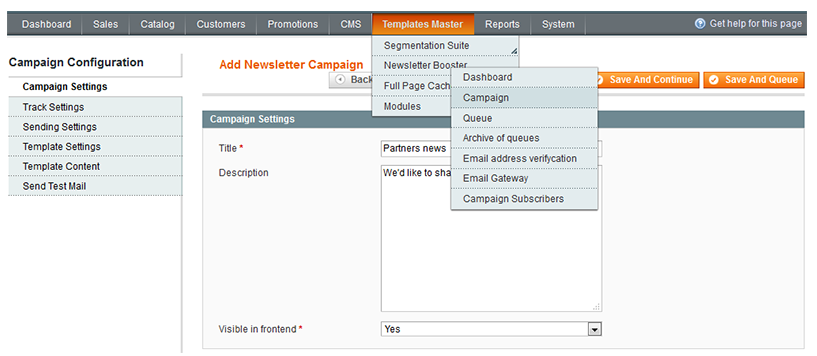
Title- specify the title of new campaign.Description- add the description for new campaign.Visible in frontend- select Yes to allow customers to subscribe to new campaign, what they are interested in, directly on the store page.
Track settings
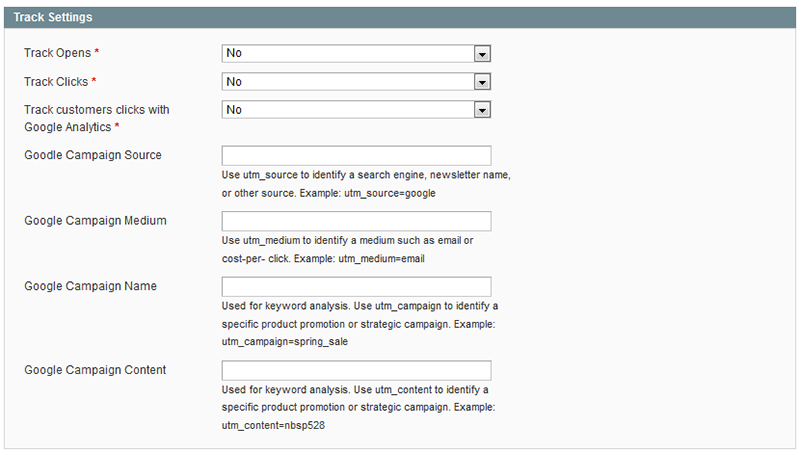
Track Opens- select Yes to be able to track whether the email was opened.Track Clicks- select Yes to be able to track whether the customer visits a website by using the link included in the email.Track customer clicks with Google Analytics- select Yes to be able to track with Google Analytics Service whether the customer visits a website by using the link included in the email.Track customer clicks with Google Analytics- select Yes to track with Google Analytics Service whether the customer visits a website by using the link included in the email.Google Campaign Source- specifyutm_sourceto identify a search engine, newsletter name, or other source. Example: utm_source=google.Google Campaign Medium- specifyutm_sourceto identify medium such as email or cost-per-click. Example: utm_medium=email.Google Campaign Name- specifyutm_campaignto identify a specific product promotion or strategic campaign. Example: utm_campaign=spring_sale.Google Campaign Content- specifyutm_contentto identify a specific product promotion or strategic campaign. Example: utm_content=528.
Sending settings
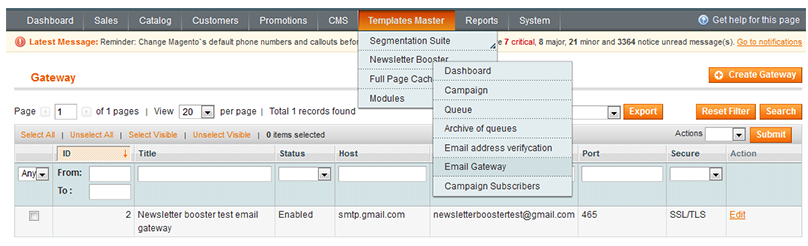
Email Gateway- select the email gateway. If you want to have another gateway, you can goAdmin > Templates-Master > Newsletter Booster > Email Gatewayand create new Email Gateway.Send for NewsletterBooster Subscribersselect Yes to enable sending campaigns to NewsletterBooster subscribers.Send for Magento Newsletter Subscribers- select Yes to enable sending campaigns to magento newsletter subscribers.Customer Segment- here you can choose already created customer segment. You are allowed to send campaign to multiple segments.
Template settings
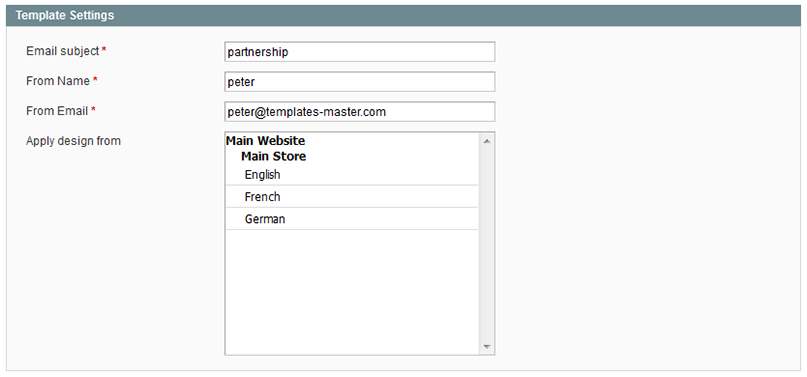
Email Subject- specify the main email subject.From Name- specify the name that will be displayed at Subject field of email.From Email- enter the email address from which the email will be sent.Apply design- apply the design for your new Campaign from one of your store.
Template content
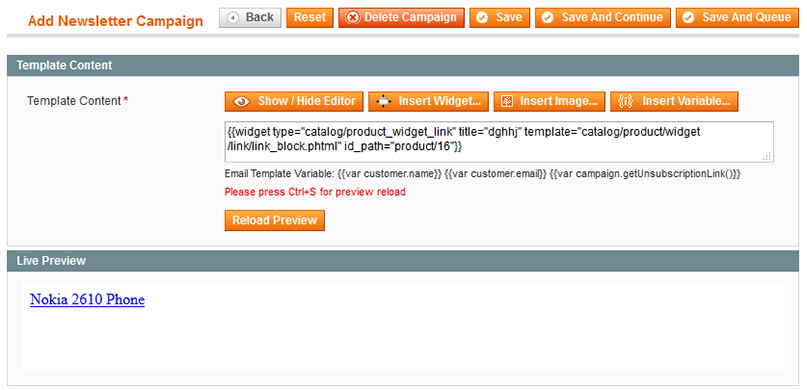
Specify the HTML code of newsletter in the Template Content field. Moreover, you can preview the content directly in a backend. Please press the Reload Preview button after the text input.
Campaign test email
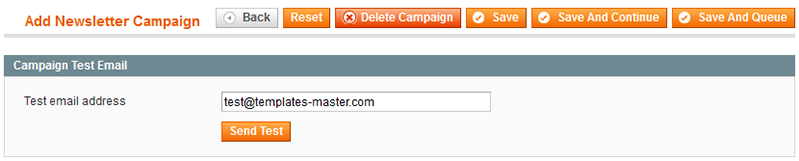
In Test email address field you have to define the email address, which will be used for testing campaign emails.
Afterwards you can save the campaign as well as use the Save and Queue button in the right corner of the page. It will allow you to manage queue of emails that were sent.
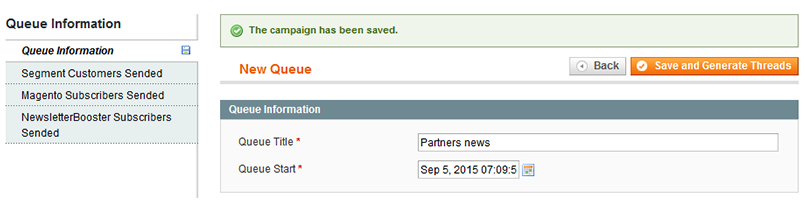
Specify the title of the e-mailing in the Queue Title field. By using the calendar you can select and set the date of e-mailing start.