Use cases
- Creating customer segment for all customers
- Creating customer segment for customers who bought products by category
- Creating customer segment for customers who bought products by brand
- Creating customer segment for customers with total order
- Creating and sending first email campaign
- Sending newsletter campaigns to different groups of subscribers
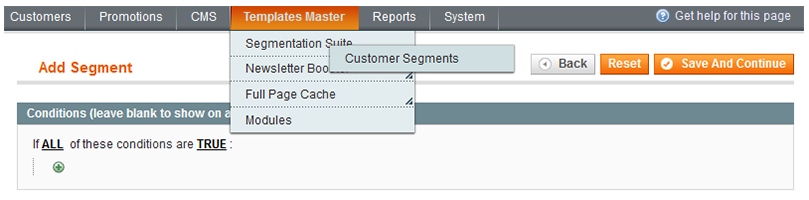
Creating customer segment for all customers
- Go
Magento Admin > Templates Master > Segmentation Suite > Customer Segmentand click Create Segment. - At
Conditions tabplease leave field blank to apply segment for all customers. - Click on Save Segment.
Creating customer segment for customers who bought products by category
- Go
Magento Admin > Templates Master > Segmentation Suite > Customer Segmentand click Create Segment. - At
Conditionstab select Order Product Attribute. - The
Total quantitymust beEqualorgreater than. - Click on green dot and choose the condition Category.
- Then please press grid button and select subcategory.
- Click on Save Segment.

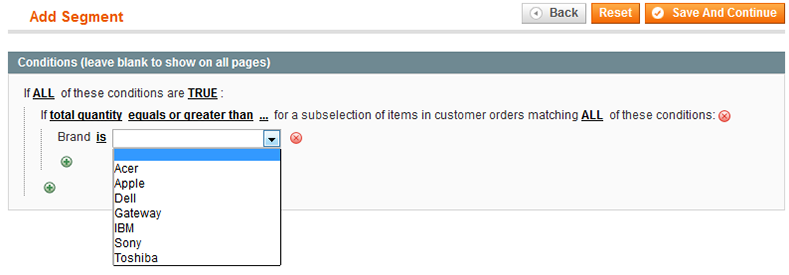
Creating customer segment for customers who bought products by brand
- Go to
Magento Admin > Templates Master > Segmentation Suite > Customer Segmentand click Create Segment. - At
Conditionstab select Order Product Attribute. - The
Total quantitymust beEqualorgreater than. - Click on green dot and choose the condition Brand.
- Then please press 3 dots and select one of brands.
- Click on Save Segment.
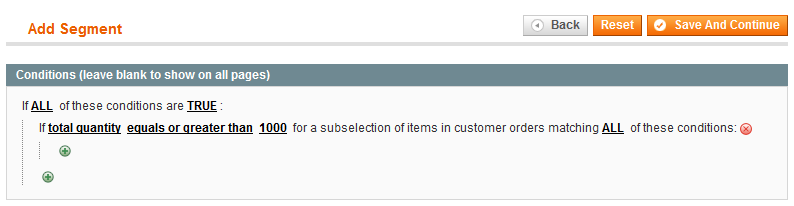
Creating customer segment for customers with total order
- Go to
Magento Admin > Templates Master > Segmentation Suite > Customer Segmentand click Create Segment. - At
Conditionstab select Order Product Attribute. - The
Total amountmust beEqualorgreater than 1000. - Click on Save Segment.
Creating and sending first email campaign
- Go to
Magento Admin > Templates Master > Segmentation Suite > Customer Segmentand click Create Segment. If you use Mandrill Appi Service or store mail to send emails, then go to the next item. If not and you want to create third-party mail server, please go `Magento Admin > Templates Master > Newsletter Booster > Email Gateway and click on Create Gateway. - Go Magento
Admin > Templates Master > Newsletter Booster > Campaignand click on Create Campaign. Please fill all fields according to your needs and click on Save Campaign. - Then press Queue button at the right top of the page, that appears after saving new campaign. Please fill all fields according to your needs and click on Save Queue.
- Then you can go to
Magento Admin > Templates Master > Newsletter Booster > Dashboardand check the statistical information.
Sending newsletter campaigns to different groups of subscribers
Please notice, that by using our extension you are allowed to create and send newsletter campaigns to Customer segment users, Magento newsletter subscribers and Newsletter Booster subscribers separately. We’re going to explain the sending process to Customer Segment subscribers.

- Go
Admin > Templates Master > Segmentation Suite > Customer Segmentand click Create Segment. - Add Segment with filling all required fields. See examples mentioned in use cases above.
- Go
Admin > Templates Master > Newsletter Booster > Campaignsand create a new campaign. You can use the previous use case example. - Please specify the required information in all Campaign Configuration tabs.
- When you navigate to
Sending Settings tabyou can set campaign newsletter sending to specific subscribers’ group. In case of configuring sending settings for Customer segment group only, you have to select No both in theSend for Newsletter Booster subscribersandMagento newsletter subscribersfields. - Select the already created customer segment from the drop-down.
- Save.
Note: if you want to send the newsletter campaign only to Magento subscribers or to the Newsletter Booster’s subscribers separately, please select Yes in the appropriate fields.