Use cases
- Using code for changing location of Sold Together block with layout XML file.
- Using code in phtml file to display Sold Together block.
- Placing blocks with related products in the shopping cart Ajax Pro 3.0.
- Adding blocks to the email after the order has been submitted.
Using code for changing location of Sold Together block with layout XML file.
Please connect to FTP server and find Magento files.Then follow the App>design>frontend>base>default>layout>tm>sold together.xml. Open file to be edited. Search
<catalog_product_view>
    <reference name="content">
        <block type="soldtogether/order" name="product.info.soldtogetherorder" before="-">
            <action method="setTemplate" ifconfig="soldtogether/general/enabled"><template>tm/soldtogether/order.phtml</template></action>
        </block>
        <block type="soldtogether/customer" name="product.info.soldtogethercustomer" after="product.info.soldtogetherorder">
            <action method="setTemplate" ifconfig="soldtogether/general/enabled"><template>tm/soldtogether/customer.phtml</template></action>
        </block>
    </reference>
</catalog_product_view>
Using code in phtml file to display Sold Together block.
Please apply the following code in phtml file on the product page.
<?php echo $this->getLayout()->createBlock('soldtogether/order')->setTemplate('tm/soldtogether/order.phtml')->toHtml(); ?>
Placing blocks with related products in the shopping cart Ajax Pro 3.0.
Go to Admin > System > Configuration > AjaxPro and follow next steps:
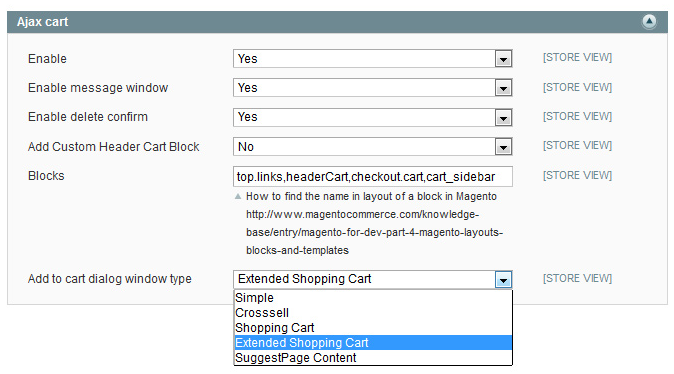
Enable- select Yes.Enable message window- select Yes.Add to cart dialog window typeselect Suggest page content from drop down list.
Adding blocks to the email after the order has been submitted.
If you are using Magento 1.9.2.2 version or later, you can add Sold Together blocks to the confirmation email about new order submission.
Before actions mentioned below, please check the soldtogether/email_customer and soldtogether/email_order block in System > Permissions > Blocks page. If you don’t see this block in the grid, you have to add it manually by using Add New Block button.
Next steps to follow:
- Go
System > Transactional Emailsand click Add New Template. Look atLoad Default templatefieldset. In theTemplatedrop down please select a New Order value. Specify your Locale. Press Load Template button. -
You can see the whole code of template content. In order to add block with cross-selling products, please place the following code anywhere you want:
{{block type='soldtogether/email_customer' area='frontend' order=$order}} {{block type='soldtogether/email_order' area='frontend' order=$order}} -
Specify the name for the template and save.
- Go
System > Configuration > Sales Emailsand look at Order fieldset. InNew Order confirmation templatedrop down please select the template you’ve created before and save.
Note: when you create a confirmation email for quest, you have to select a New Order For Guest value in step #1. Within the step #4 please make changes in a New Order Confirmation Template For Guest field.