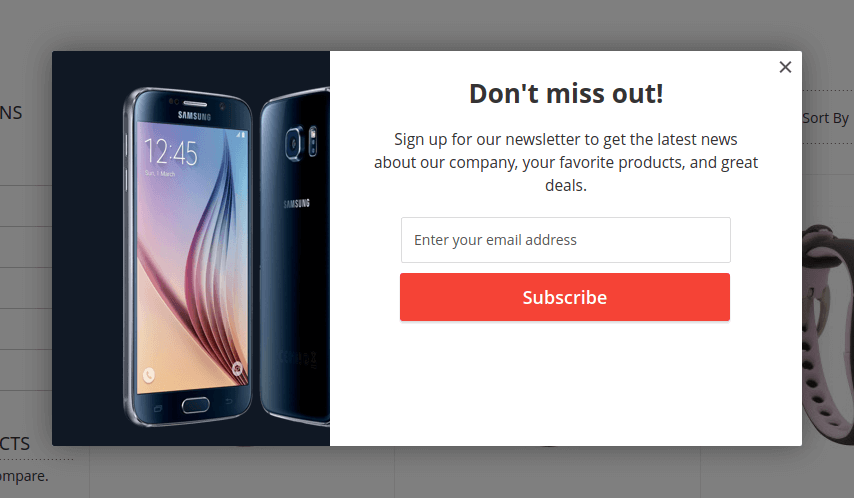
Newsletter Popup

General Settings
To create popup with newsletter form, create a new Lightbox banner with
following values:
| Field | Value |
|---|---|
| Enabled | Yes |
| Type | Lightbox |
| Url | Any dummy text (We will not use it) |
| Css Class | no-border permanent-close-hide |
| Mode | HTML Content |
Additionally, you can add some animation to the lightbox popup. Top do that, use one of the following css classes:
- slide-up
- slide-down
- slide-left
- slide-right
- zoom-in
- zoom-out
You can read more about CSS classes at the separate page.
HTML Content:
<div class="easybanner-layout-book">
    <img src="{{media url='wysiwyg/samsung.png'}}" alt="" />
    <div class="content center">
        <h2 class="easybanner-title"><strong>Don't miss out!</strong></h2>
        <p>
            Sign up for our newsletter to get the latest news about our company,
            your favorite products, and great deals.
        </p>
        <div class="easybanner-newsletter">
            {{block class="Magento\Newsletter\Block\Subscribe" name="easybanner.newsletter-subscribe" template="Magento_Newsletter::subscribe.phtml"}}
        </div>
    </div>
</div>
Conditions
Now, let’s make the banner appear on exit-intent event only.
Exit-intent condition is supported since version 1.5.0.
Switch to Conditions tab and add the following conditions:
| Condition | Value | Comment |
|---|---|---|
| Exit intent time (seconds) greater than | 0 | Show popup as soon as client’s cursor moves out of the page. |
| Display Count per Customer (Per Day) less than | 1 | Optional. |
Save the banner and check your store frontend.
p.s. Since mobile devices doesn’t have a cursor, we can’t detect when client wants to leave the site using the same checks. That’s why we will show exit-intent banner when mobile customer scrolls up the page to reveal browser toolbar.
